How to deply the Angular + .Net Core WebAPI using an Azure DevOps CI pipeline?
Instruction
How to create and deply the Angular + .Net Core WebAPI as an Azure App Service using an Azure DevOps CI pipeline?
Prerequisites
- Azure Account
- Source code pushed to your GitHub repository
- Ready-to-deploy ASP.NET Core application configured similarly to this case
I found many examples for the same folder for the project.In this case, I separated the front-end and the back-end in different folder however in the same repo of the github and the same solution.Let’s start it.
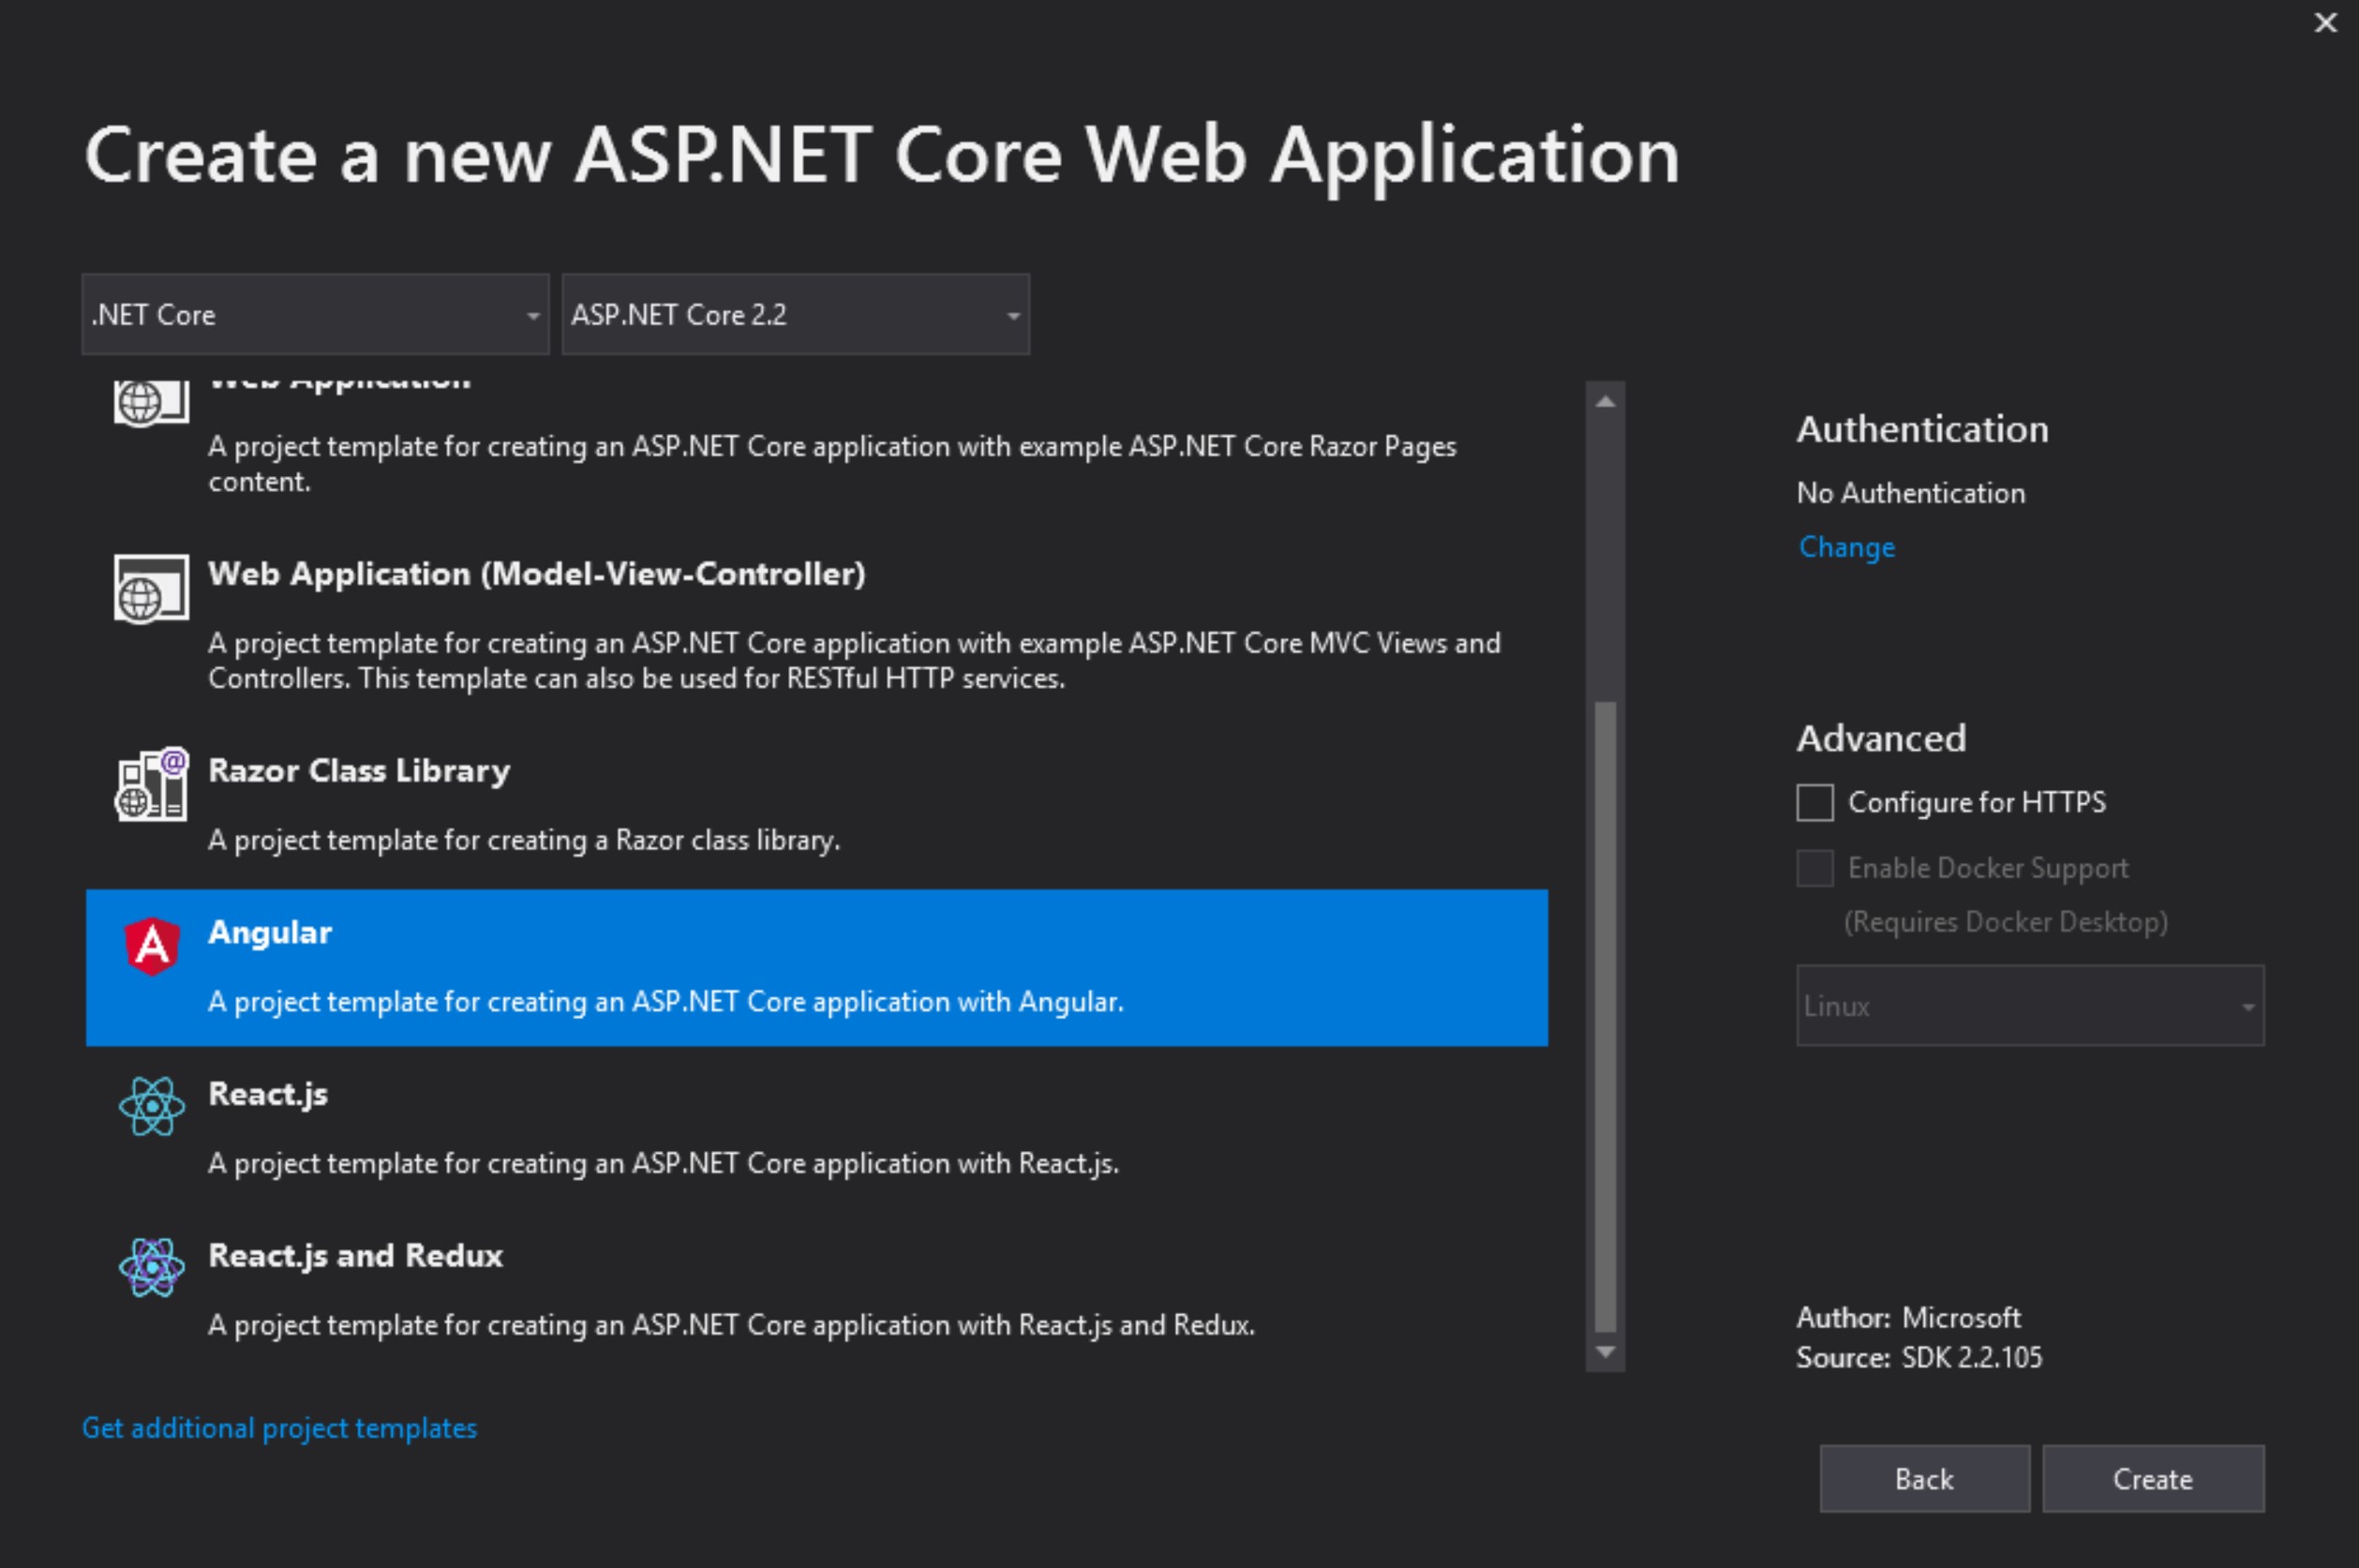
Create the Project
I am using the angular template for the illustration. If you have your own project,you can skip this part.
you can create your DotnetCore 3.1 Project ,as below
 and use the Angular template.
You will see the solution as below.
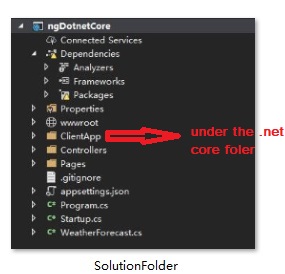
Move the Folder
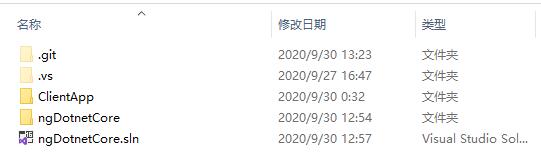
You can add the folder to the solution like this.
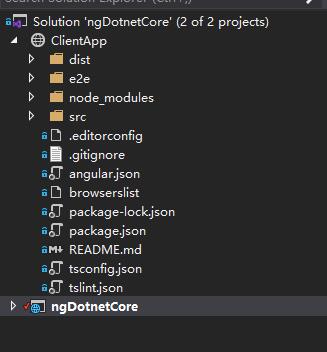
Update the solution file
In this case, we need to update the ngDotnetCore.csproj which is for the .net core backend code.
Change the SpaRoot because we changed the Angular front-end to the other folder.
<SpaRoot>..\ClientApp\</SpaRoot>
Remove the setting for the npm install as below . Because you will use the Azure DevOps to run it later.
Remove this
<!-- As part of publishing, ensure the JS resources are freshly built in production mode -->
    <Exec WorkingDirectory="$(SpaRoot)" Command="npm install" />
    <Exec WorkingDirectory="$(SpaRoot)" Command="npm run build -- --prod" />
    <Exec WorkingDirectory="$(SpaRoot)" Command="npm run build:ssr -- --prod" Condition=" '$(BuildServerSideRenderer)' == 'true' " />
Add this as below. It will copy the front-end files to back-end folder and include the newly-built files in the publish output.
  <Target Name="PublishRunWebpack" AfterTargets="ComputeFilesToPublish">
    <!-- Include the newly-built files in the publish output -->
    <!-- Copy the dist from the front end folder -->
    <ItemGroup>
      <_CopyItems Include="$(SpaRoot)dist\**\*.*" />
    </ItemGroup>
    <Copy SourceFiles="@(_CopyItems)" DestinationFolder="dist" />
    <!-- Include the dist from the front end folder,if in the other folder it can't include in the publish output folder  -->
    <ItemGroup>
      <DistFiles Include="dist\**;" />
      <ResolvedFileToPublish Include="@(DistFiles->'%(FullPath)')" Exclude="@(ResolvedFileToPublish)">
        <RelativePath>%(DistFiles.Identity)</RelativePath>
        <CopyToPublishDirectory>PreserveNewest</CopyToPublishDirectory>
        <ExcludeFromSingleFile>true</ExcludeFromSingleFile>
      </ResolvedFileToPublish>
    </ItemGroup>
  </Target>
After this, please push your project to your github account.
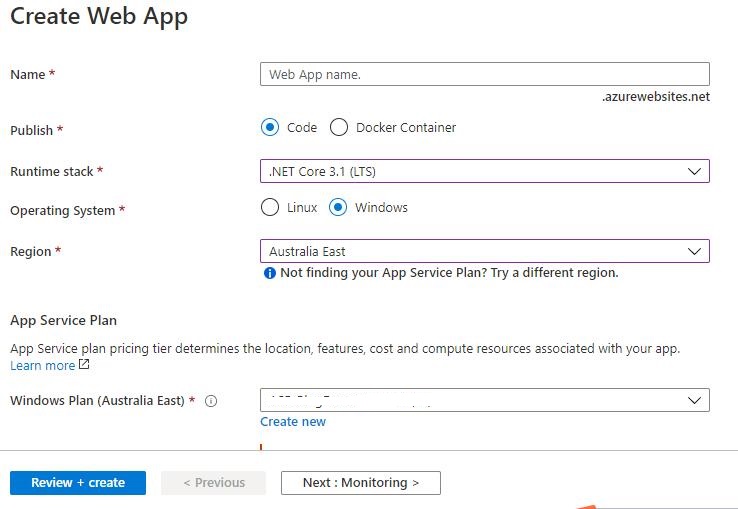
Create Web App
Create the Webapp in Azure.Be care to choose free plan if you wouldn’t like to pay anything.
And make sure the .net core version is 3.1 ,it should be the same version with your project.
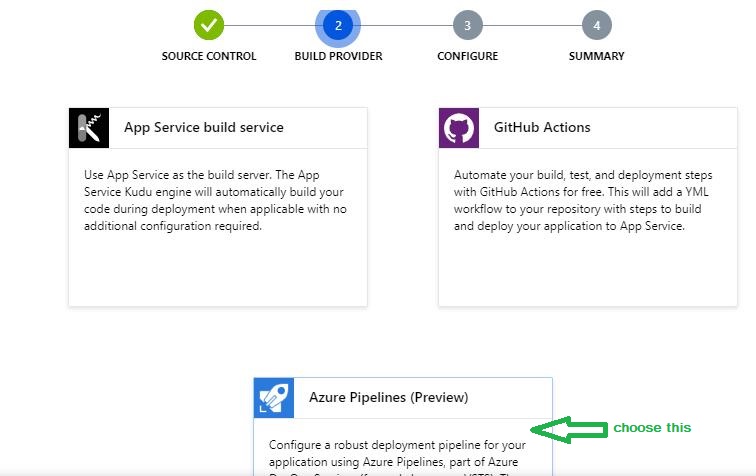
Choose the new web app to the deployment center,set your github repo for the project.

Choose Build Provider -> Azure Pipelines (Preview)
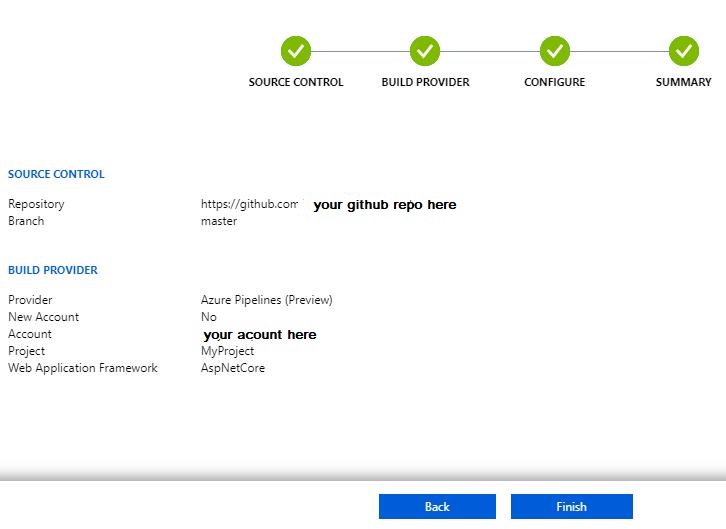
 -> set your github configure

-> finish all the settings
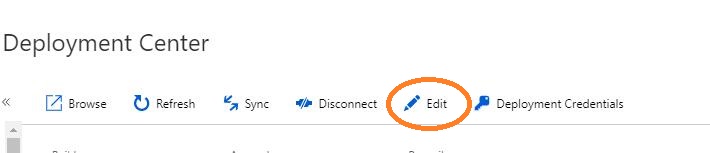
Edit Your Pipeline
->the deployment center
you will go to the azure devops , it need to create your account and project at the first time. Then you will see as below

Edit Your Job
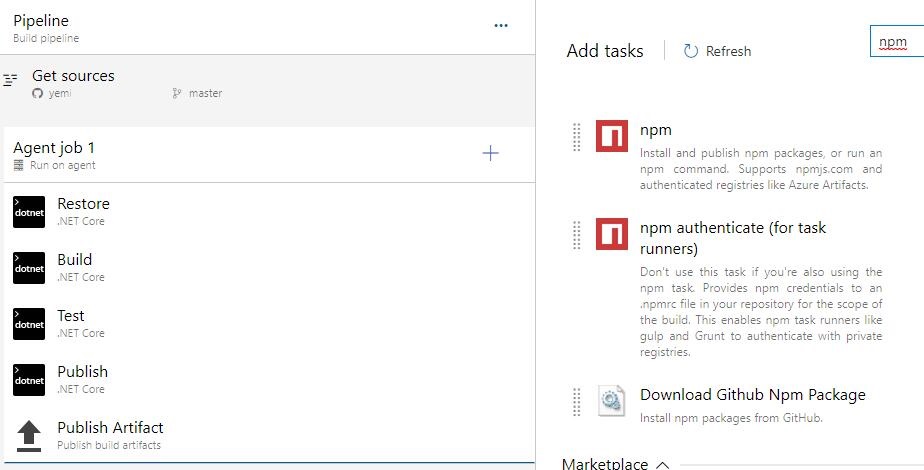
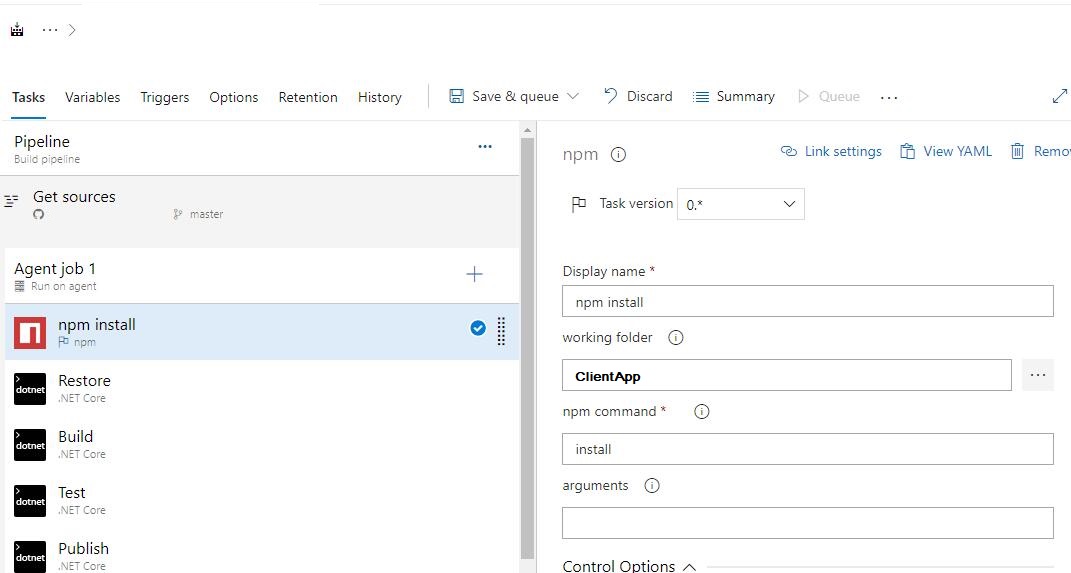
It will generate the .net core task as usual, you can add a new task of the npm install for the angular build.
Set the working folder to where your angular front-end is located
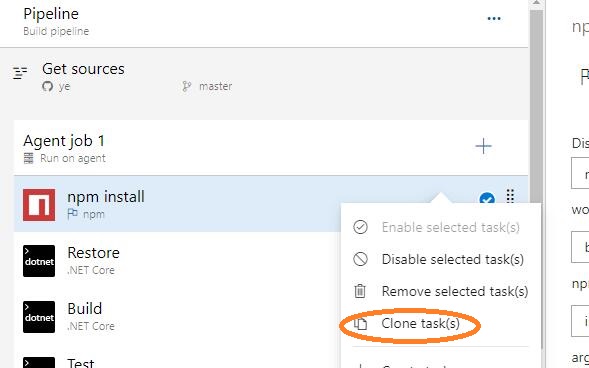
Clone the task
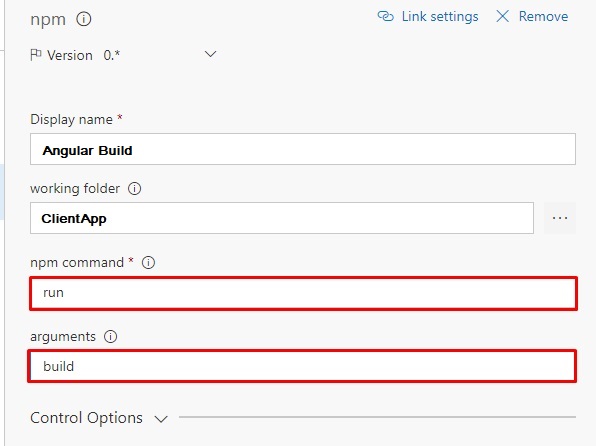
and update the command run build
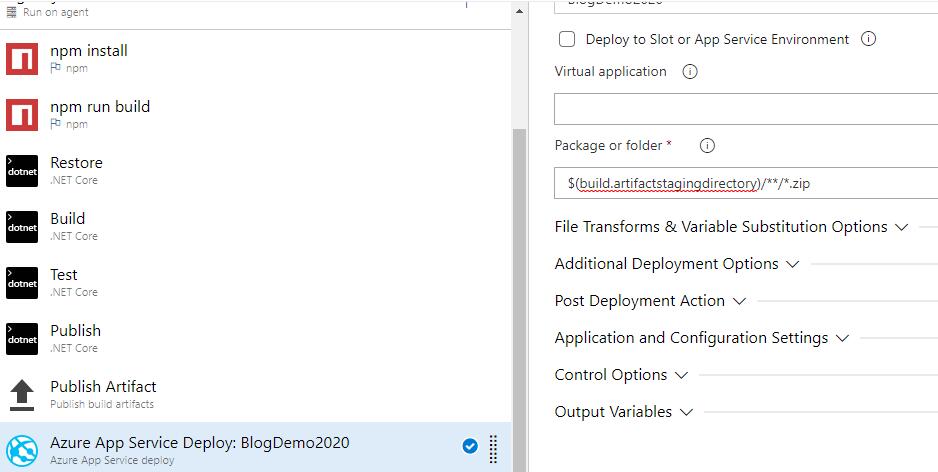
Create the Azure App Service Deploy Task
This task will take your compiled .NET Core application and publish it to your Azure Web App service.
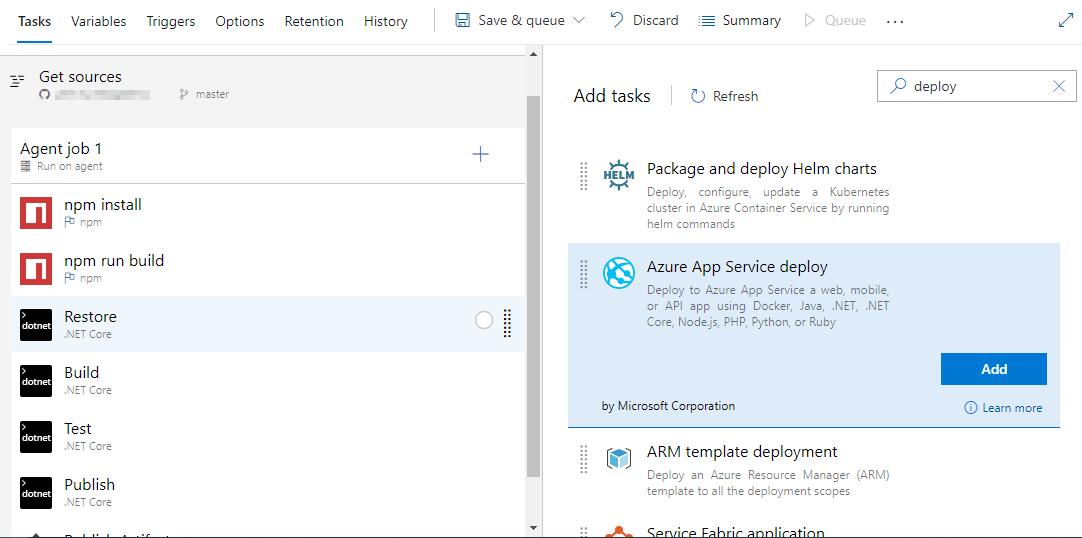
Set your package location to the output of the .NET Core: Publish task:
$(build.artifactstagingdirectory)/**/*.zip
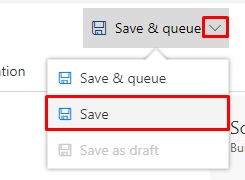
Save your job
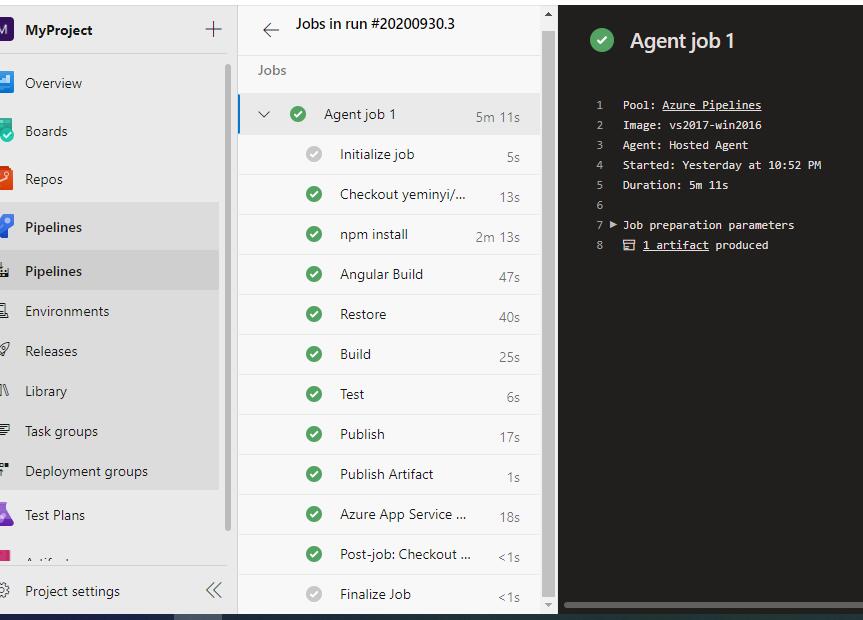
Run your job or commit & push something, you will see your task run as below
pool:
  name: Azure Pipelines
  demands: npm

#Your build pipeline references an undefined variable named ‘Parameters.RestoreBuildProjects’. Create or edit the build pipeline for this YAML file, define the variable on the Variables tab. See https://go.microsoft.com/fwlink/?linkid=865972
#Your build pipeline references an undefined variable named ‘Parameters.RestoreBuildProjects’. Create or edit the build pipeline for this YAML file, define the variable on the Variables tab. See https://go.microsoft.com/fwlink/?linkid=865972
#Your build pipeline references the ‘BuildConfiguration’ variable, which you’ve selected to be settable at queue time. Create or edit the build pipeline for this YAML file, define the variable on the Variables tab, and then select the option to make it settable at queue time. See https://go.microsoft.com/fwlink/?linkid=865971
#Your build pipeline references an undefined variable named ‘Parameters.UnitTestProjects’. Create or edit the build pipeline for this YAML file, define the variable on the Variables tab. See https://go.microsoft.com/fwlink/?linkid=865972
#Your build pipeline references the ‘BuildConfiguration’ variable, which you’ve selected to be settable at queue time. Create or edit the build pipeline for this YAML file, define the variable on the Variables tab, and then select the option to make it settable at queue time. See https://go.microsoft.com/fwlink/?linkid=865971
#Your build pipeline references the ‘BuildConfiguration’ variable, which you’ve selected to be settable at queue time. Create or edit the build pipeline for this YAML file, define the variable on the Variables tab, and then select the option to make it settable at queue time. See https://go.microsoft.com/fwlink/?linkid=865971

steps:
- task: Npm@0
  displayName: 'npm install'
  inputs:
    cwd: ClientApp

- task: Npm@0
  displayName: 'Angular Build '
  inputs:
    cwd: ClientApp
    command: run
    arguments: build

- task: DotNetCoreCLI@2
  displayName: Restore
  inputs:
    command: restore
    projects: '$(Parameters.RestoreBuildProjects)'

- task: DotNetCoreCLI@2
  displayName: Build
  inputs:
    projects: '$(Parameters.RestoreBuildProjects)'
    arguments: '--configuration $(BuildConfiguration)'

- task: DotNetCoreCLI@2
  displayName: Test
  inputs:
    command: test
    projects: '$(Parameters.UnitTestProjects)'
    arguments: '--configuration $(BuildConfiguration)'

- task: DotNetCoreCLI@2
  displayName: Publish
  inputs:
    command: publish
    publishWebProjects: True
    arguments: '--configuration $(BuildConfiguration) --output "$(build.artifactstagingdirectory)"'
    zipAfterPublish: True

- task: PublishBuildArtifacts@1
  displayName: 'Publish Artifact'
  inputs:
    PathtoPublish: '$(build.artifactstagingdirectory)'

- task: AzureRmWebAppDeployment@4
  displayName: 'Azure App Service Deploy: Pipelines2020'
  inputs:
    azureSubscription: 'pipelines2020 - 1 - Azure'
    WebAppName: Pipelines2020
    packageForLinux: '$(build.artifactstagingdirectory)/**/*.zip'
A Problem
the DotNetCoreCLI@2 task not publish (zip) the project?
Aways ignore it ,if publishWebProjects to True.
Just update it to False
Pls refer this
Npm Task
Npm verson 1.* have cuscom command, 0.* can’t use it.
Please refer this
Reference
https://github.com/dotnet/AspNetCore.Docs/blob/master/aspnetcore/azure/devops/cicd.md